Monday, December 29, 2014

2014 Holiday Cards

Similar to our 2013 holiday cards, I once again ordered photo cards from Costco and crafted part of the card, along with having a collage of family pictures (from our family and maternity photo shoot back in October). I like the Costco photo cards as a starting point because they:
  • come with lined envelopes
  • come with five photo calendars this year (one more than last year!), which I send to grandparents and also give one to Greg for his office
  • have a $5 off coupon ahead of Thanksgiving (the price starts at $15 for 50 cards with envelopes, so $5 off that makes it a really good price)
2014 Holiday Card | shirley shirley bo birley Blog 2014 Holiday Card | shirley shirley bo birley Blog

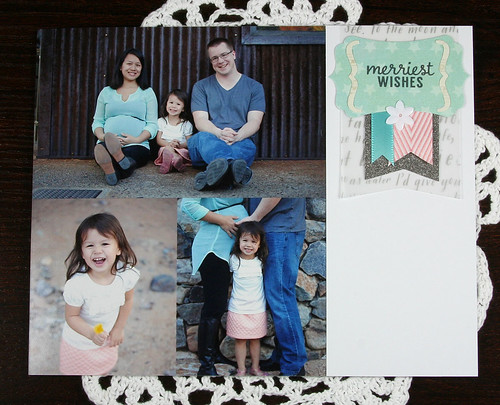
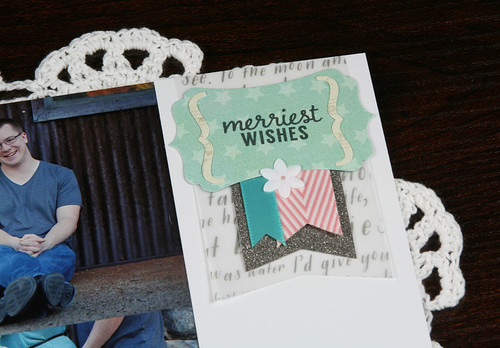
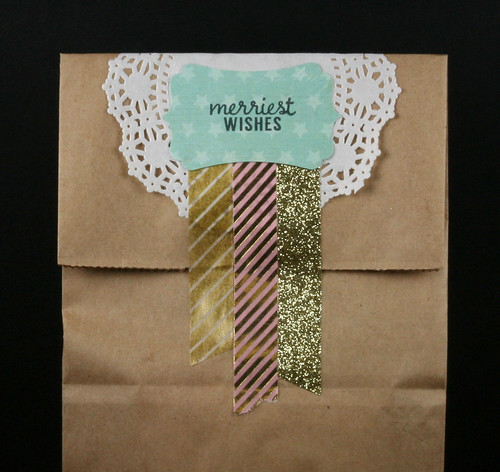
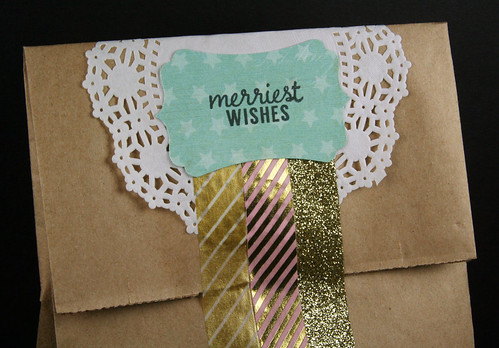
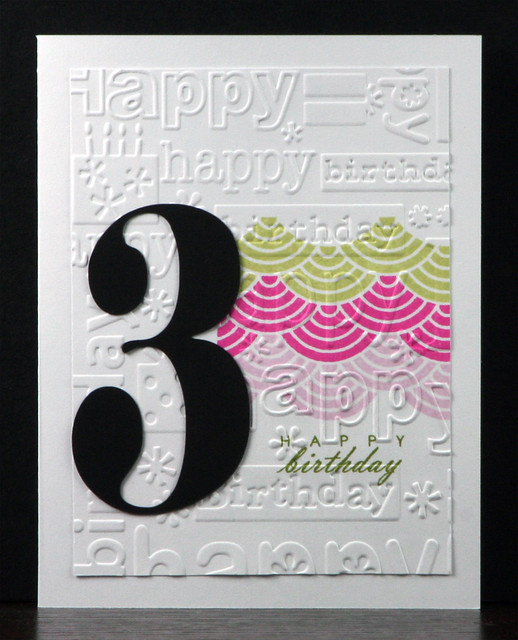
This year, the handmade part was positioned to the right. I started with a strip of white cardstock as the base, and layered on the vellum with silver text, a dark grey glitter paper, as well as aqua and pink ribbons. I stamped the "merriest wishes" sentiment on the punched shape, added the punched brackets on either side, then added all that plus a white sequin to the other layers.

SUPPLIES:

Paper: Staples (110 lb white cardstock); We R Memory Keepers (Sheer Metallic Silver Sentiment vellum); American Crafts (Charcoal POW! glitter paper); Simple Stories (Hello Baby Blue Wood/Stars patterned paper); Authentique (Believe collection Essence patterned paper)
Embellishments: Teresa Collins (Nine & Co sequins); Scrapbooks Etc (local scrapbook store - ribbons)
Stamps: Hero Arts Stamp and Cuts Ornament
Tools: EK Success Journal Plate and Bracket Large Punch
Ink: Tsukineko Memento Tuxedo Black ink

Friday, December 26, 2014

Glitter Washi Chevron Background Card

I wanted to post about our holiday cards this year (half-handmade, if you will, similar to our 2013 holiday card), but I have a few last minute cards going out (really last minute), so I'm holding off until next week.

Instead, here's a card with a chevron background, put together with Pinkfresh Studio's glitter washi tape (hot pink and violet, light blue and light pink, and dusty rose and light gold), as well as some other Pinkfresh Studio embellishments:

Pinkfresh Glitter Washi Chevron Card | shirley shirley bo birley Blog

I again masked off part of the sentiment on the stamp so I could use just the "happy day" part, like on this card. The chevron background is made from four strips of vellum (equal width), with washi tape adhered in 45 degree angles.

SUPPLIES:

Paper: Doodlebug Designs Sprinkles Vellum Lily White; SEI (gray patterned paper - it's really old from when I first started scrapbooking); Paper Source paper bag solid cardstock
Embellishments: Pinkfresh Studio (glitter washi tape in hot pink and violet, light blue and light pink, and dusty rose and light gold; wood drop stickers)
Stamps: Pinkfresh Studio clear stamps from Fresh Inspiration Kit; Doodlebug Designs white lace washi tape; Wilton doily from Jo-Ann
Ink: Tsukineko Memento Tuxedo Black ink

Monday, December 22, 2014

Wood Slice Ornament - Wood Veneer Collage

I was waiting for some Evalicious wood veneers to arrive (these Oh What Fun wood veneers) so that I could make another wood slice ornament. They finally came last week, and this ornament came together pretty quickly.

I already had the wood slice painted gold, and Greg did the screw eye at the same time as the other ones (the cork reindeer and the chalkboard wood slice ornaments), so it was just a matter of choosing the wood veneers for the wood slice, painting them with a couple of coats of acrylic paint, and adhering the painted wood veneers to the wood slice.

Wood Veneer Ornament | shirley shirley bo birley Blog

Only a couple of the wood veneers aren't from the Evalicious Oh What Fun wood veneer set - the birdie (which is Studio Calico) and the circle snowflake (which is from Elle's Studio Good Cheer wood veneer set).

Thursday, December 18, 2014

Retro Sketches 145 Happy Day Card

Card for this week's retro sketch:

Retro Sketch 145 | http://retrosketches.blogspot.com/2014/12/retrosketches-145.html
Happy Day Card for Retro Sketch 145 | shirley shirley bo birley Blog

I painted the wood veneers with acrylic paint to get them the colors I was looking for, and also masked off part of the sentiment stamp so that I could just stamp the "happy day" part. Rather than doing a vertical card like in the sketch, I made it horizontal, in addition to making the card smaller than the standard 4.25 by 5.5 (I sized it to fit the puffy scallop sticker that I wanted to use).

SUPPLIES:

Paper: Allison Kreft for Echo Park - Everyday Eclectic - Kraft Doily patterned paper; SEI (gray patterned paper - it's really old from when I first started scrapbooking)
Embellishments: Pinkfresh Studio (washi tape, puffy scallop sticker, triangle wood veneer, enamel frame); Studio Calico (bird wood veneer)
Stamps: Pinkfresh Studio sentiment stamp
Ink: acrylic paint from Michael's and Jo-Ann; Tsukineko Memento Tuxedo Black ink

Monday, December 15, 2014

Wood Slice Ornaments - Cork Reindeer and Chalkboard

I recently bought some wood slices from Etsy with aspirations of making some handmade ornaments this year, which I successfully executed (can't say that about all the ideas that come to my head).

I looked at both Etsy and Amazon before deciding to go with birch slices sold by Rachel's Scraps (here are her wood slice listings) - they looked the most like what I pictured in my head. The ornaments were pretty easy to make, especially after I had gotten all the supplies together. I thought about how to actually hang the ornaments and looked on Pinterest for some ideas, finally deciding on giving screw eyes a try, which turned out great with some help from Greg on the drill front.

SUPPLIES:

INSTRUCTIONS:


For the basic ornament (adding the screw eye):
  1. Sandwich wood slice between two pieces of scrap wood and clamp to work surface, so the wood doesn't move when drilling
  2. Drill 1/16 inch hole into side of wood slice
  3. Hand-screw the screw eye into the drilled hole (should be easy since it's so small)
  4. I didn't need to do this, but if the screw eye is a little loose in the drilled hole, some glue can be added to secure it
For the cork reindeer ornament:
Cork Reindeer Wood Slice Ornament | shirley shirley bo birley Blog Cork Reindeer Wood Slice Ornament | shirley shirley bo birley Blog
  1. Paint two coats of acrylic paint over wood slice in chosen color. I used a Robin's Egg blue. Let each coat dry afterwards.
  2. Mask off bottom section of wood slice. I used blue painter's masking tape. Make sure the edge is pressed down firmly so the paint doesn't bleed under the paint.
  3. Paint two coats of acrylic paint in a different chosen color. I used gold.
  4. Cut desired shape (in my case, a reindeer) using Silhouette. I downloaded the flying reindeer set from the Silhouette design store and sized the reindeer I wanted to fit within the dimensions of my wood slice. I did some quick researching online of whether the Silhouette could cut cork and read on a forum that although it can, it doesn't come out very crisp, which I expected and also experienced when I cut the reindeer shape. I had my machine set at speed 1, blade setting 8, and also flipped the cork sheet to be upside down (cork side on the mat), but then also needed to go back and hand-cut the shape out.
  5. Adhere die cut shape to painted wood slice. Since the cork sheet already had adhesive on the back, it was just a matter of peeling and sticking.
For the chalkboard ornament:
Chalkboard Ornament | shirley shirley bo birley Blog Chalkboard Ornament | shirley shirley bo birley Blog
(It's so easy I almost feel silly writing this out . . .)
  1. Paint two coats of chalkboard paint over wood slice.
  2. Prime the chalkboard paint by rubbing chalk over the entire surface (this makes it so that when you erase, it's not so apparent what you wrote/drew on the chalkboard paint surface before).
  3. Write monogram in chalk (or draw whatever).
  4. Optional, but I added a little sprig of berry to the top for decoration.

Thursday, December 11, 2014

LetterCraft Arizona Heart Ornament and Packaging

At work, there's an annual women's networking event that's a white elephant-style ornament exchange. I went the first year after I switched companies (I did not end up with a desirable-to-me ornament), skipped last year, but went this year.

I spotted these handmade Arizona wood ornaments by LetterCraft on the Phoenix Flea Facebook page and got one of the Arizona heart ornaments for the exchange:

LetterCraft Arizona Heart Ornament

Since it's a white elephant ornament exchange, the ornaments have to be wrapped. I decided to use a plain brown paper lunch bag, but quickly embellished it with a doily, washi tape, and extra punched/stamped label (from holiday cards - which I really need to get on top of!):

Ornament Exchange Gift Bag | shirley shirley bo birley Blog

I also, fortunately, ended up with an ornament that was better than last time!


On the topic of Arizona products . . . I saw this Arizona Home State shirt design last month at the Believe Boutique. I don't think I could pull off the off-the-shoulder sweatshirt look, but I was a fan of the design (it comes in other styles - tank top, long sleeve, and short sleeve):


Monday, December 8, 2014

Embossed and Painted Background Card

I'd been wanting to try brayering acrylic paint onto a dry embossing folder and using that for the background of a card. I finally gave it a try a few weeks ago, but it didn't turn out quite as crisp and neat an impression with the paint (the paint got into crevices that it shouldn't have) as I'd envisioned in my head. Maybe I need more practice, because I feel like I have seen other people do it, but it could also be the medium (i.e., I should try using something other than acrylic paint). I instead just ended up dry embossing first, then using the brayer to apply acrylic paint to the raised surfaces of the paper. I used the embossed and painted background on this card:

Embossed and Painted Background Card | shirley shirley bo birley Blog

SUPPLIES:

Paper: Prima Marketing (All About Me patterned paper - I cut the circles of patterns into pennants)
Embellishments: Studio Calico (bird wood veneers); Whisker Graphics (Peppermint Divine Twine); Wilton doily from Jo-Ann; mt washi tape; washi tape from Pick Your Plum
Tools: Darice (woodgrain embossing folder)
Ink: acrylic paint from Jo-Ann

Thursday, December 4, 2014

9 Weeks (Maternity) Layout

Baby K #2 finally has his own layout! This ultrasound was from the first doctor visit. He's actually been very active in the last eight or so weeks. I feel like, though I don't remember for sure, that he became significantly more active slightly later than Evie.

This was one of those layouts that came together fairly quickly for me. I got the Studio Calico paper maybe half a year to a year ago, and sat on it until I felt like I had the right idea for a layout.

9 Weeks (Maternity) Scrapbook Layout | shirley shirley bo birley Blog

SUPPLIES:

Paper: Studio Calico Atlantic collection Scarborough patterned paper
Embellishments: Evalicious (paper tags, paper clips, puffy stickers); Project Life (journaling card from Seafoam core kit); American Crafts (Thickers); My Mind's Eye (washi tape)

Monday, December 1, 2014

White-on-White Embossed Birthday Card

I was feeling the white-on-white embossed baby card I made before, so I followed the same style to make a birthday card for my friend Stephanie's daughter, Ruby. Since her birthday party was Tinkerbell themed, I chose ink colors along those lines (green, purple, and pink).

White-on-White Embossed Birthday Card | shirley shirley bo birley Blog

SUPPLIES:

Paper: Bazzill Basics Paper black cardstock; Staples white cardstock
Stamps: Avery Elle (Fanfare clear stamp set); Papertrey Ink (Fillable Frames #4)
Tools: Cuttlebug (happy birthday embossing folder); Silhouette Cameo (cutting the "3")
Ink: Ranger Distress inks

Blog Design by Get Polished | © 2018 shirley shirley bo birley blog