I looked at both Etsy and Amazon before deciding to go with birch slices sold by Rachel's Scraps (here are her wood slice listings) - they looked the most like what I pictured in my head. The ornaments were pretty easy to make, especially after I had gotten all the supplies together. I thought about how to actually hang the ornaments and looked on Pinterest for some ideas, finally deciding on giving screw eyes a try, which turned out great with some help from Greg on the drill front.
SUPPLIES:
- Wood slices, about 1/4 inch thick (wood slices by Rachel's Scraps on Etsy)
- Paint (acrylic, chalkboard)
- Cork paper (Die Cuts with a View)
- Wood veneers
- Foam brush
- Screw eyes (#216 1/2 inch)
- Twine and/or ribbon (for hanging the ornament)
- Drill and 1/16 inch bit
- Silhouette (I have a Cameo)
INSTRUCTIONS:
For the basic ornament (adding the screw eye):
- Sandwich wood slice between two pieces of scrap wood and clamp to work surface, so the wood doesn't move when drilling
- Drill 1/16 inch hole into side of wood slice
- Hand-screw the screw eye into the drilled hole (should be easy since it's so small)
- I didn't need to do this, but if the screw eye is a little loose in the drilled hole, some glue can be added to secure it

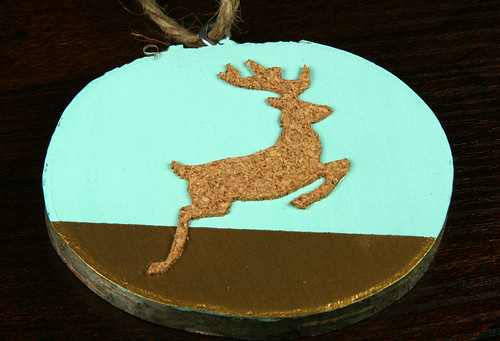
- Paint two coats of acrylic paint over wood slice in chosen color. I used a Robin's Egg blue. Let each coat dry afterwards.
- Mask off bottom section of wood slice. I used blue painter's masking tape. Make sure the edge is pressed down firmly so the paint doesn't bleed under the paint.
- Paint two coats of acrylic paint in a different chosen color. I used gold.
- Cut desired shape (in my case, a reindeer) using Silhouette. I downloaded the flying reindeer set from the Silhouette design store and sized the reindeer I wanted to fit within the dimensions of my wood slice. I did some quick researching online of whether the Silhouette could cut cork and read on a forum that although it can, it doesn't come out very crisp, which I expected and also experienced when I cut the reindeer shape. I had my machine set at speed 1, blade setting 8, and also flipped the cork sheet to be upside down (cork side on the mat), but then also needed to go back and hand-cut the shape out.
- Adhere die cut shape to painted wood slice. Since the cork sheet already had adhesive on the back, it was just a matter of peeling and sticking.

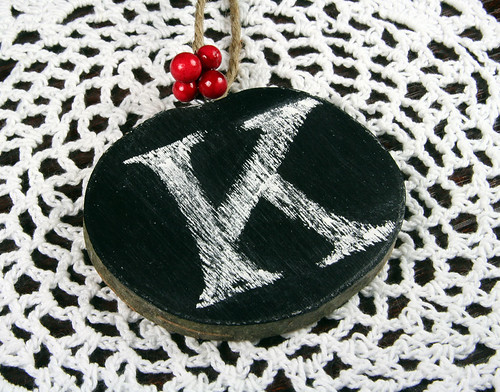
- Paint two coats of chalkboard paint over wood slice.
- Prime the chalkboard paint by rubbing chalk over the entire surface (this makes it so that when you erase, it's not so apparent what you wrote/drew on the chalkboard paint surface before).
- Write monogram in chalk (or draw whatever).
- Optional, but I added a little sprig of berry to the top for decoration.